
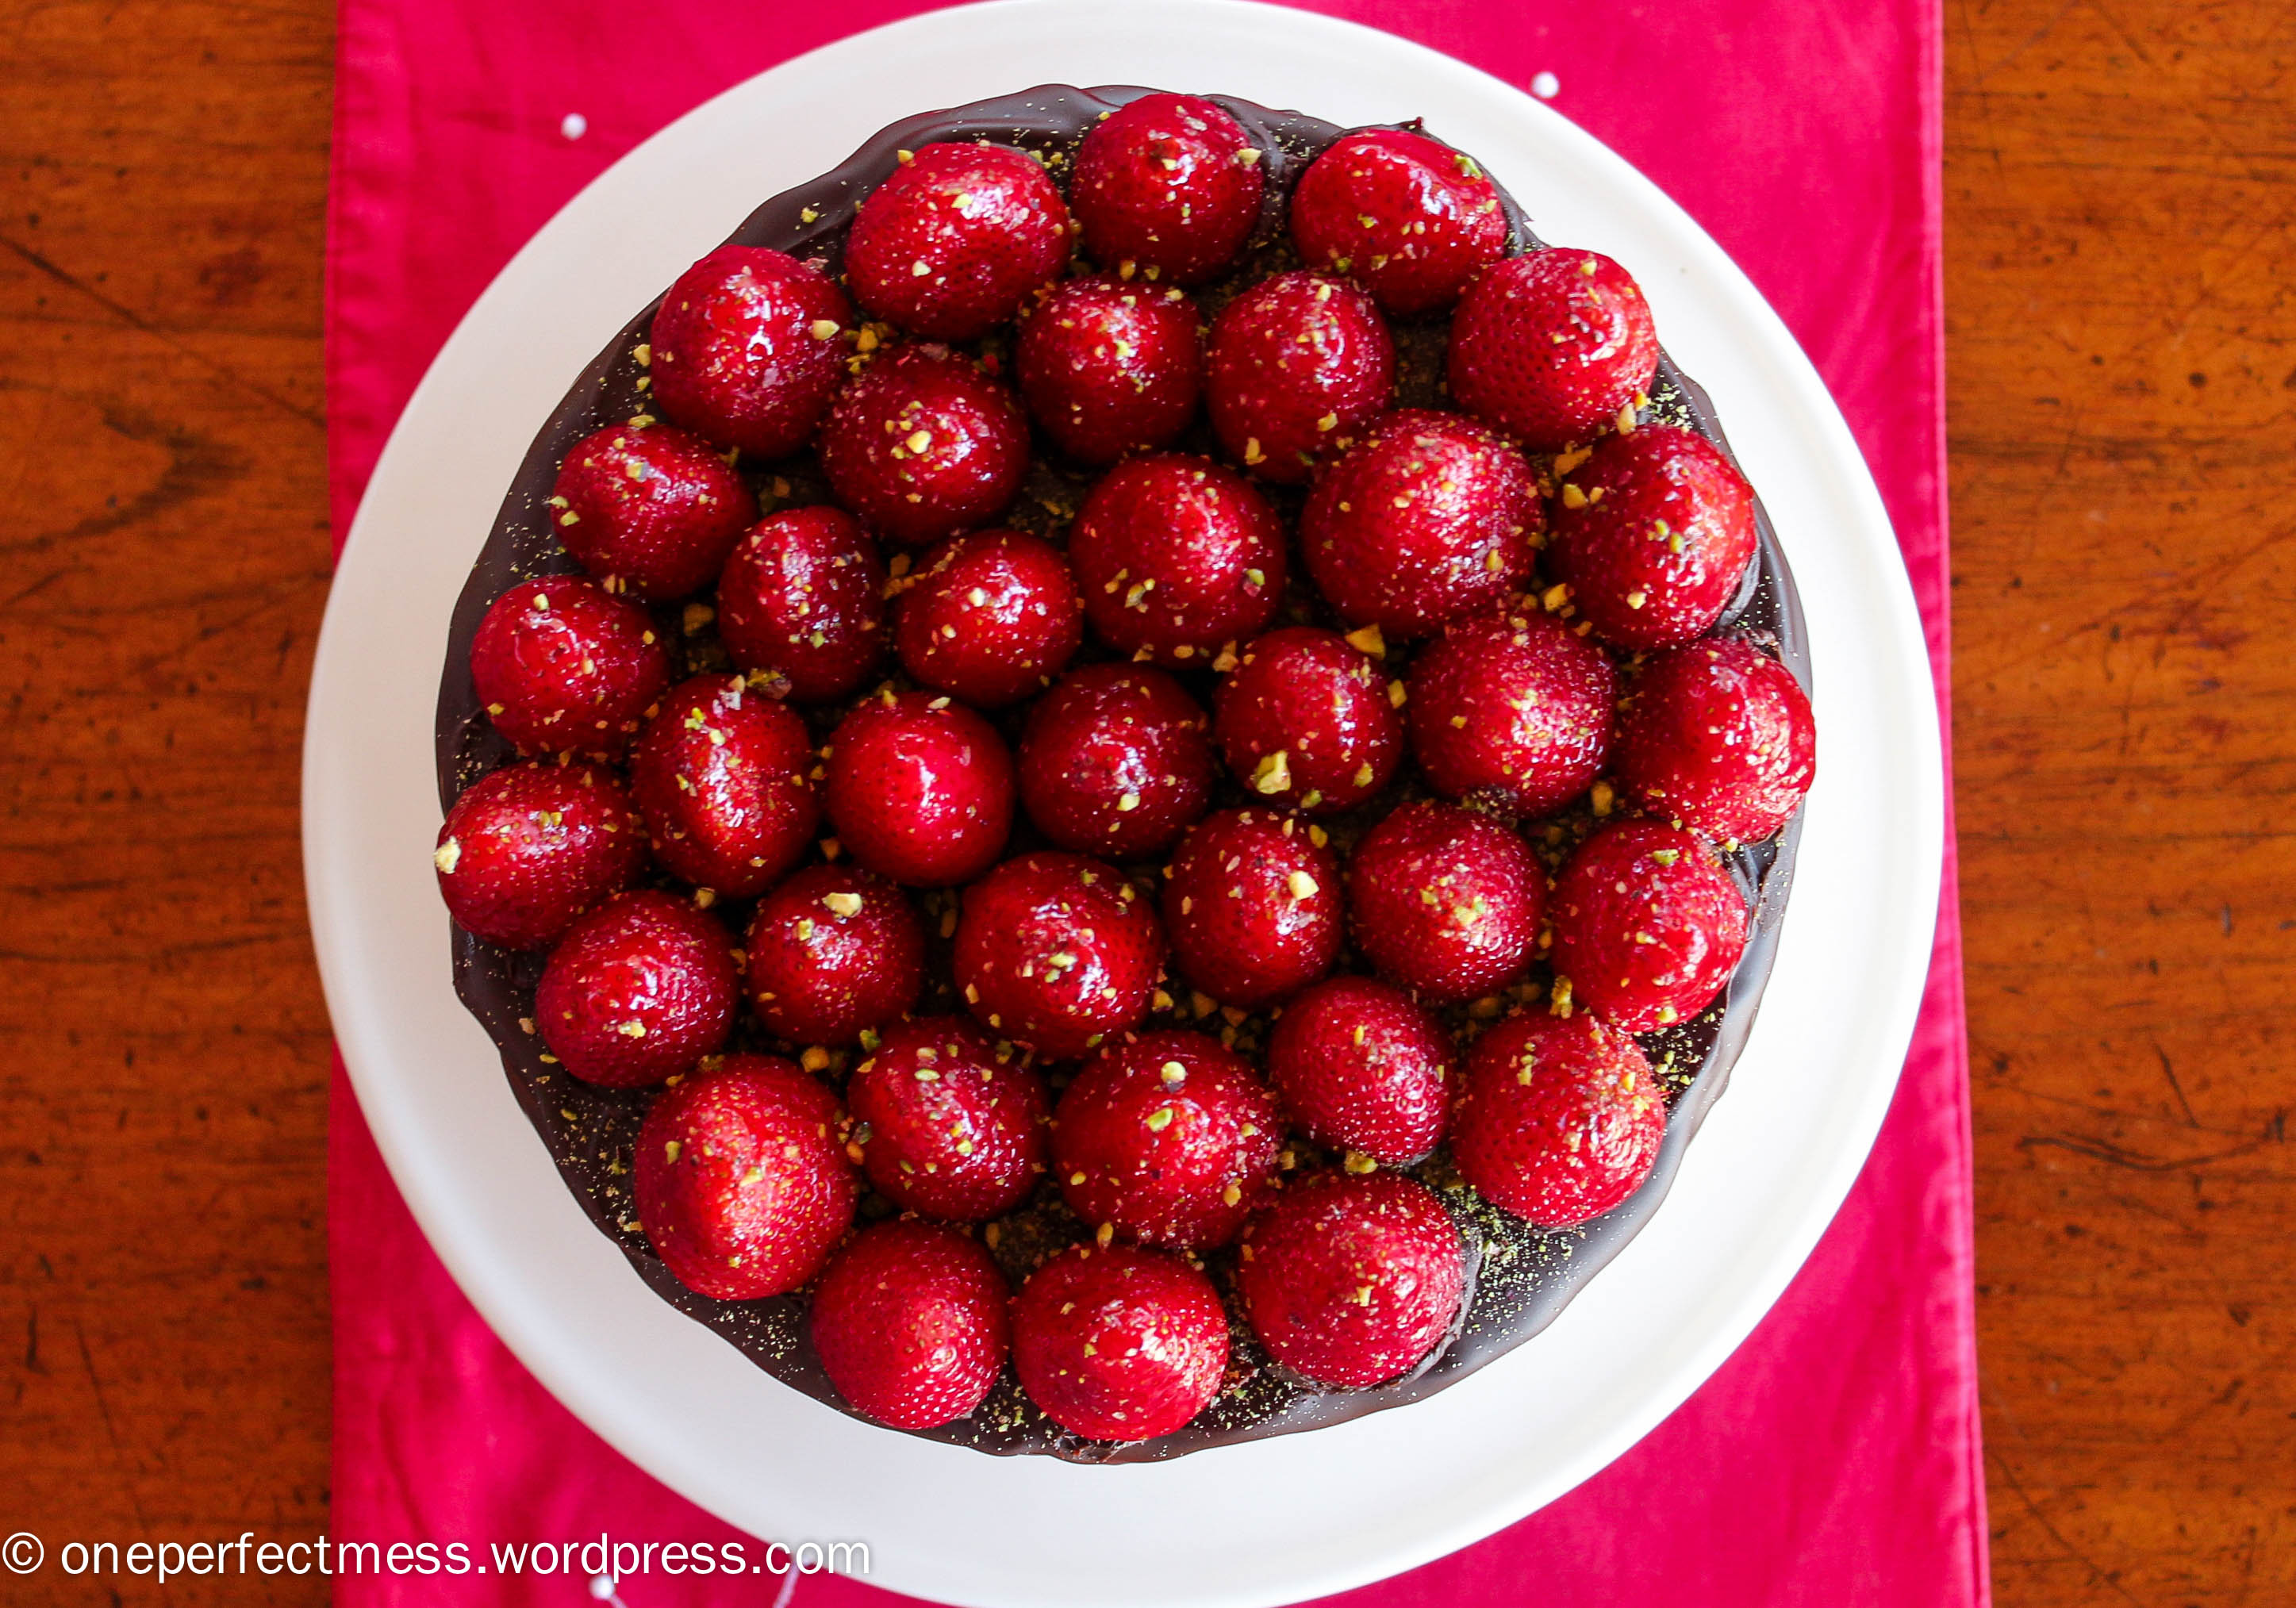
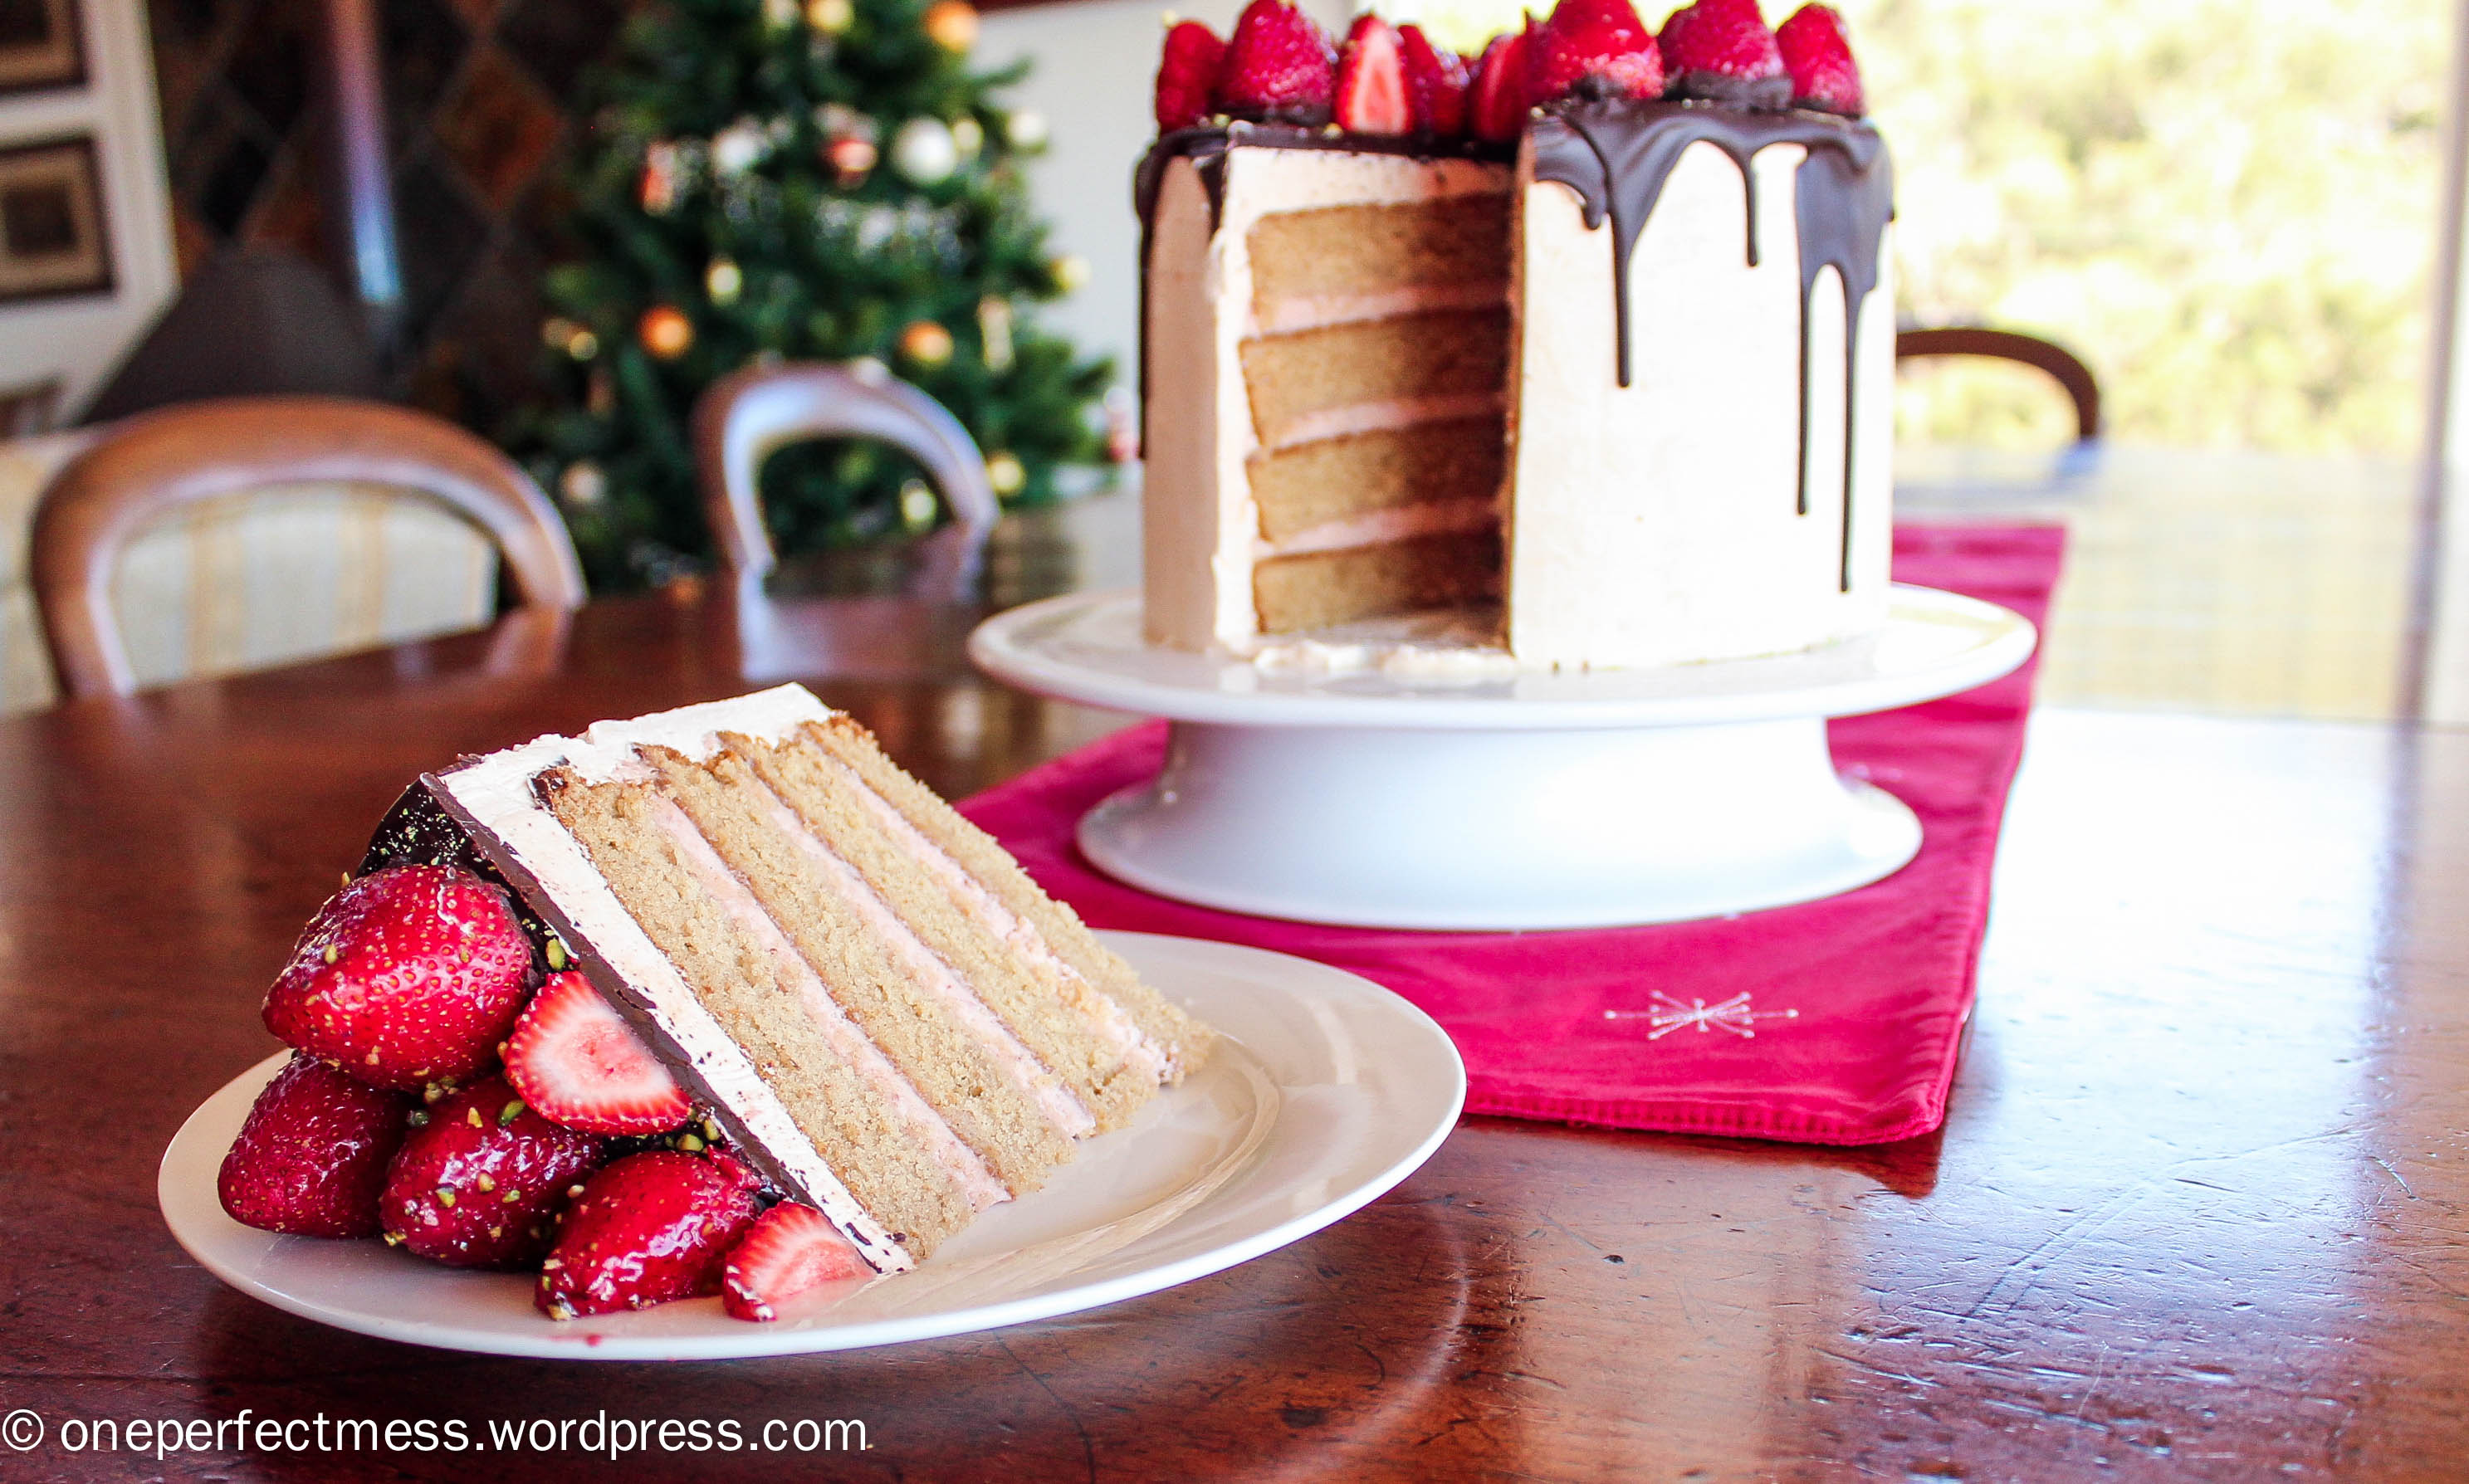
So guess what? I’ve passed 1000 views on this little blog! This is a pretty big milestone for me, and I’m so excited to know that there are people out there who are enjoying what I bake and ramble about, and wondering what I’m going to throw out there next. I usually dapple in pretty simple ‘home-cook’ style recipes, but to celebrate I thought I’d go all out with something special. This beauty is composed of four layers of vanilla spice cake that are interspersed with layers of fresh strawberry mousse, then the whole thing is encased in rosewater Swiss Meringue Buttercream, drizzled with dark chocolate ganache, and covered in glazed strawberries and chopped pistachio nuts. Are you tempted yet?
I’m going to be straight up with you, it did take me a solid day to bake, fill, frost and decorate this epic cake, but it was just so so so worth it that I urge you to have a go at it these holidays! Each component isn’t very difficult to make, but assembling the cake (if you are a highly anal perfectionist such as myself) is what requires a little more time and effort. I spent days dreaming up the perfect combination of flavours and textures and styles to come up with a cake that looks spectacular, but also tastes delicious. The actual cake contains extra egg whites, so is light and fluffy, almost like a sponge but without the hassle of preparation. Also, the combination of vanilla, cardamon, ginger, cinnamon and honey provides a flavour that is wonderfully reminiscent of Christmas, and perfectly complementary to the sweetness of the accompanying strawberries and chocolate. Whilst definitely indulgent, I didn’t find the cake overly rich or sweet, so you can definitely treat yourself and your friends to a solid slice each without rolling around groaning on the floor afterwards.
My inspiration for this style of cake came from one of my favourite cake bloggers, Sweetapolita, who often uses Swiss Meringue Buttercream (SMB) as her frosting of choice for her great big beautiful cakes. The recipe involves heating egg whites and sugar over simmering water, then whipping these two ingredients up into glossy meringue, before very slowly adding cubes of butter to form a thick, silky, creamy frosting that is really easy to work with. The buttercream sets hard in the fridge, making it easy to neaten up once set for a perfectly smooth finish to your cake. Also, because of its high butter quantity it is not a particularly sweet icing in comparison to many others, which is what makes it so easy to eat from the bowl! Finally, SMB is very adaptable, and can be easily coloured and flavoured to your hearts content using flavouring essences/extracts, fruit purées, chocolates, spices… the creative options are endless.
So if you feel like you’re willing to give this whole thing a go, read through these helpful tips before you get started;
- I baked my cakes ‘layer-by-layer’ to ensure each layer cooks evenly and quickly. This saves baking time and effort later on, as I find it very difficult to halve cakes evenly without wanting to tear my hair out. You will still need to slice the domed tops off each layer, but overall in my opinion this process is much easier.
- I used two 19.5 cm cake tins to bake my layers, so I baked the four layers in two batches. I actually prepared two lots of the cake batter (by dividing the recipe by two and carrying out the method twice), as I feared that leaving half the batter on the bench while I baked the first two cakes which alter the consistency of the mixture. This does take a little more effort, and I’m not sure how much of a difference it really made, but for my own peace of mind I decided to do it this way.
- Bake your cakes and spread the strawberry mousse between each layer the day before you frost and decorate the cake. For best results, you should refrigerate the cakes after baking before you slice their domes off and assemble them with the mousse, as refrigerated cakes are much sturdier and easier to work with. Similarly, you should let the cakes and mousse set together overnight before frosting the outside of the cake, to ensure your cake doesn’t shift or collapse in the final stages of assembly. This process does take some pre-planning, but I find that preparing the cake in steps is easier to organise into my daily schedule, and ultimately makes the whole venture much safer and less stressful!
- SMB can be refrigerated in an airtight container for up to one week, or frozen for up to 6-8 weeks. Before using it to frost your cake, allow it to cool to room temperature, then beat it on low speed using an electric mixture for 5 minutes until it retains its silky, soft consistency. For ease, if possible prepare the SMB immediately before you frost your cake. The recipe provided makes slightly more SMB than is required for this cake, but I think it’s good to have a little extra for peace of mind.
- After the final chilling stage, remove the cake from the refrigerator 1-2 hours before serving, to allow the frosting and cake layers to soften to room temperature. This is when they will taste best.


Vanilla Spice Celebration Cake with Strawberries, Chocolate Ganache and Rosewater Frosting
Preparation Time: 3-4 hours
Total Time: 6-8 hours, or overnight (plan ahead; read through the recipe and prepare a schedule that works best for you)
INGREDIENTS
Vanilla Spice Cake
- 570 g plain flour
- 500 g white sugar
- 5 teaspoons baking powder
- 2 teaspoons salt
- 3 teaspoons ground cinnamon
- 3 teaspoons ground cardamon
- 2 teaspoons ground ginger
- 340 g unsalted butter, cubed and at room temperature
- 480 mL whole milk, at room temperature
- 4 large fresh egg yolks, at room temperature
- 6 large fresh egg whites (390 g), at room temperature
- 2 teaspoons vanilla bean paste, or 4 teaspoons vanilla extract
- 8 tablespoons honey
Strawberry Mousse
- 600 mL thickened cream
- 350 g fresh strawberries, roughly chopped
- 1 teaspoon vanilla bean paste, or 2 teaspoons vanilla extract
- 1 tablespoon caster sugar
- 1 teaspoon gelatin powder
- 2 tablespoons boiling water
- 1 tablespoon fresh lemon juice
Rosewater Swiss Meringue Buttercream from Sweetapolita
- 10 large, fresh egg whites (300 g)
- 500 g white sugar
- 680 g unsalted butter, cut into small cubes and cool, but not cold (leave out of fridge for 15-20 minutes before use)
- 2 teaspoons vanilla bean paste, or 4 teaspoons vanilla extract
- 4 teaspoons rosewater essence
- Pinch of salt
Chocolate Ganache
- 230 g good quality dark cooking chocolate
- 150 g unsalted butter, cubed
To Decorate
- Approximately 35-40 fresh strawberries, hulled, washed and dried
- 1/2 cup (120 g) good quality raspberry or strawberry jam
- 1 tablespoon fresh lemon juice
- 2 tablespoons water
- 10 g unsalted pistachio nuts, very finely chopped or blitzed in food processor
Optional but very useful tools
- Rotating cake turntable
- 20 cm foil covered cake board
- Small offset spatula (15 cm)
- Medium offset spatula (20 cm)
- Benchscraper
METHOD
Vanilla Spice Cake
- Preheat fan-forced oven to 180°C/350°F. Grease and line with baking paper two 19.5/20cm round cake tins. Grease again over the baking paper, then dust with plain flour. Tip out excess flour.
- Double sift dry ingredients (flour, sugar, baking powder, salt and spices) in the large bowl of an electric mixer. Using the paddle attachment, beat on low speed for 30 seconds to just combine.
- Add the butter, and beat on low speed for 45 seconds. Add half of the milk (240 mL), and beat on low speed for 45 seconds until the dry ingredients are just moist. Turn the speed up to medium, and beat for 2 minutes until a thick, smooth batter forms. Scrape sides of bowl and beat for another 30 seconds to ensure all dry ingredients are incorporated.
- In a separate medium mixing bowl, whisk remaining 240 mL milk, egg yolks, egg whites, vanilla and honey until combined.
- Transfer liquid mixture to a pouring jug. Gradually pour wet ingredients into dry. Add 1/4 of the liquid at a time, beating for 45 seconds on medium speed between each addition. Before the final addition, scrape the sides of the bowl. After the final addition, beat for 1.5 minutes to ensure total incorporation of ingredients. The batter should be smooth and relatively thin.
- Place another large mixing bowl onto electronic scales, and pour batter into this clean bowl to weigh. Divide weight by four. Place cake tins one at a time on scales, and pour exactly 1/4 of total batter into each tin.
- Place both tins on central rack in oven, and bake for 20 minutes. Check at the 20 minute mark, rotating the tins if they are browning more on one side than the other. Do not open the oven before 20 minutes. If necessary, continue baking for a further 3-5 minutes. My cakes took 24 minutes to be perfectly baked. When tested, a metal skewer should come out clean but moist. Take care not to over-bake the cakes.
- Allow cakes to cool in tins on a cooling rack for 10 minutes, then tip out onto greased cooling racks and allow to cool completely. Refrigerate for at least 1 hour before assembly.
- Once you have removed cakes from tins, run tins until cold water to cool completely, then dry and re-prepare tins, and bake remaining cake batter.
Strawberry Mousse
- In the bowl of an electric mixer, whisk cream on medium speed for 5-7 minutes until stiff peaks form.
- In a food processor, blitz strawberries and vanilla. Completely dissolve sugar and gelatin in boiling water, then add to strawberry purée with lemon juice. Blitz for a few seconds to combine.
- Gradually pour purée into whipped cream while whisking on low speed until almost combined. Use a spatula to gently fold the mixture and complete incorporation. Take care to not over-work the cream. It will loose some of its stiffness, but the gelatin and lemon will encourage it to set when refrigerated.
- Refrigerate for at least 1.5 hours before use.
Rosewater Swiss Meringue Buttercream
- In a large heatproof bowl over a pot of simmering water, gently hand-whisk the egg whites and sugar until sugar has just dissolved and mixture appears white (5-10 minutes). Alternatively, use a candy thermometer to whisk until temperature of mixture reaches 70°C/160°F. Ensure you whisk gently but constantly, so that egg whites do not cook.
- Transfer mixture to the large bowl of an electric mixer, and whisk on medium/low speed until meringue is thick and glossy, and the bowl feels neutral to touch. It is very important that you whisk until the bowl no longer feels warm, otherwise the butter will simply melt when added. Whisk for 10-15 minutes, and if the bowl is still warm, turn mixer off and allow meringue to cool further. This will ensure you do not over-whisk meringue. Double check the temperature of the meringue by turning off the mixer, and dipping a clean finger into the centre of the meringue. It should feel at room temperature.
- Once cooled, swap whisk attachment for paddle attachment. With the mixer on its lowest possible speed, gradually add butter one cube at a time, beating for a few seconds between each addition. The buttercream will suddenly loosen and may appear thin or scrambled as you go, but just keep beating on low speed until all butter is incorporated.
- Once all of the butter is added, continue beating on low speed for a minute or two. The buttercream should be thick and glossy. If it is too thin, the butter was too soft when added, so refrigerate buttercream for 15 minutes to firm up and then continue beating. If it appears too thick or scrambled (literally like scrambled eggs!) the butter was too cold when added, so keep beating on low speed until buttercream is smooth.
- Add vanilla, rosewater essence and salt and beat on lowest speed for one minute to combine.
Chocolate Ganache
- In a medium heatproof bowl over a pot of simmering water, heat chocolate and butter. Scrape sides of the bowl regularly with a spatula until almost melted, then remove bowl from heat and continue stirring until completely melted. Ensure absolutely no water gets into the ganache.
To Assemble
- Use a long, sharp, serrated knife to remove the domed tops from the chilled cakes. Cut the cakes side by side, getting down at eye-level to ensure each cake is the same height.
- Cover flat cake plate or turntable with a piece of greaseproof paper, using loops of sticky tape to secure. Spread a spoonful of chilled strawberry mousse onto the centre of your surface (either the foil cake board or directly onto the greaseproof paper), and secure your first layer of cake down.
- Using a butter knife or small offset spatula, spread 1/3 of chilled strawberry mousse onto the first cake layer, stopping 1 cm from the edge of the cake. Place the second cake layer on top of the mouse, pressing down from the centre of the cake outwards, to press the mouse to the edges of the cake.
- Repeat with remaining mousse and cakes. Wrap the outside of the cake tightly with a long piece of glad wrap/cling wrap, to hold the layers together while chilling. Ensure your layers are straight at this point, as once the mousse sets it will be difficult to shift the layers. Refrigerate for at least 3 hours, or overnight.
- To frost, use the following video for direction, it’s very helpful! https://www.youtube.com/watch?v=XK1Pec79tXc Here is a written summary; Spoon approximately 1.5 cups of buttercream onto the top surface of the cake. Use a butter knife or small offset spatula to spread buttercream evenly across the surface and over the sides. Add extra buttercream to the sides of the cake, and spread evenly using a butter knife or large offset spatula. Be very generous with the first layer of buttercream, as you will scrape a lot of it off when you neaten the cake. Refrigerate cake for at least 1 hour, until the buttercream is firm to touch.
- Use a butter knife or bench scraper to scrape excess buttercream from cake. Apply another thinner layer of buttercream to the entire cake, using the above method. Refrigerate cake again for at least 1.5 hours, until the buttercream is very firm to touch (leaves no fingerprints).
- Use a butter knife or bench scraper to neaten surface of cake. Refrigerate for at least half an hour.
- Meanwhile, prepare the ganache. Allow ganache to cool for 25-30 minutes, refrigerating for 5 minute intervals if necessary. It should thicken enough so that when you pour it, it just drizzles down the side of the cake. But take care to not allow it to thicken too much, or it will not drizzle at all! To test consistency, pour a little ganache on the base of an inverted glass and check that it drizzles partway down the sides of the glass.
- When you are happy with the ganache, pour 2/3 of it onto the surface of the cake, using a butter knife or small offset spatula to spread ganache to the edges of the cake. Allow it to drizzle down the sides. Add more ganache and repeat as necessary. Work quickly, as once the ganache hits the cooled cake, it will set rapidly.
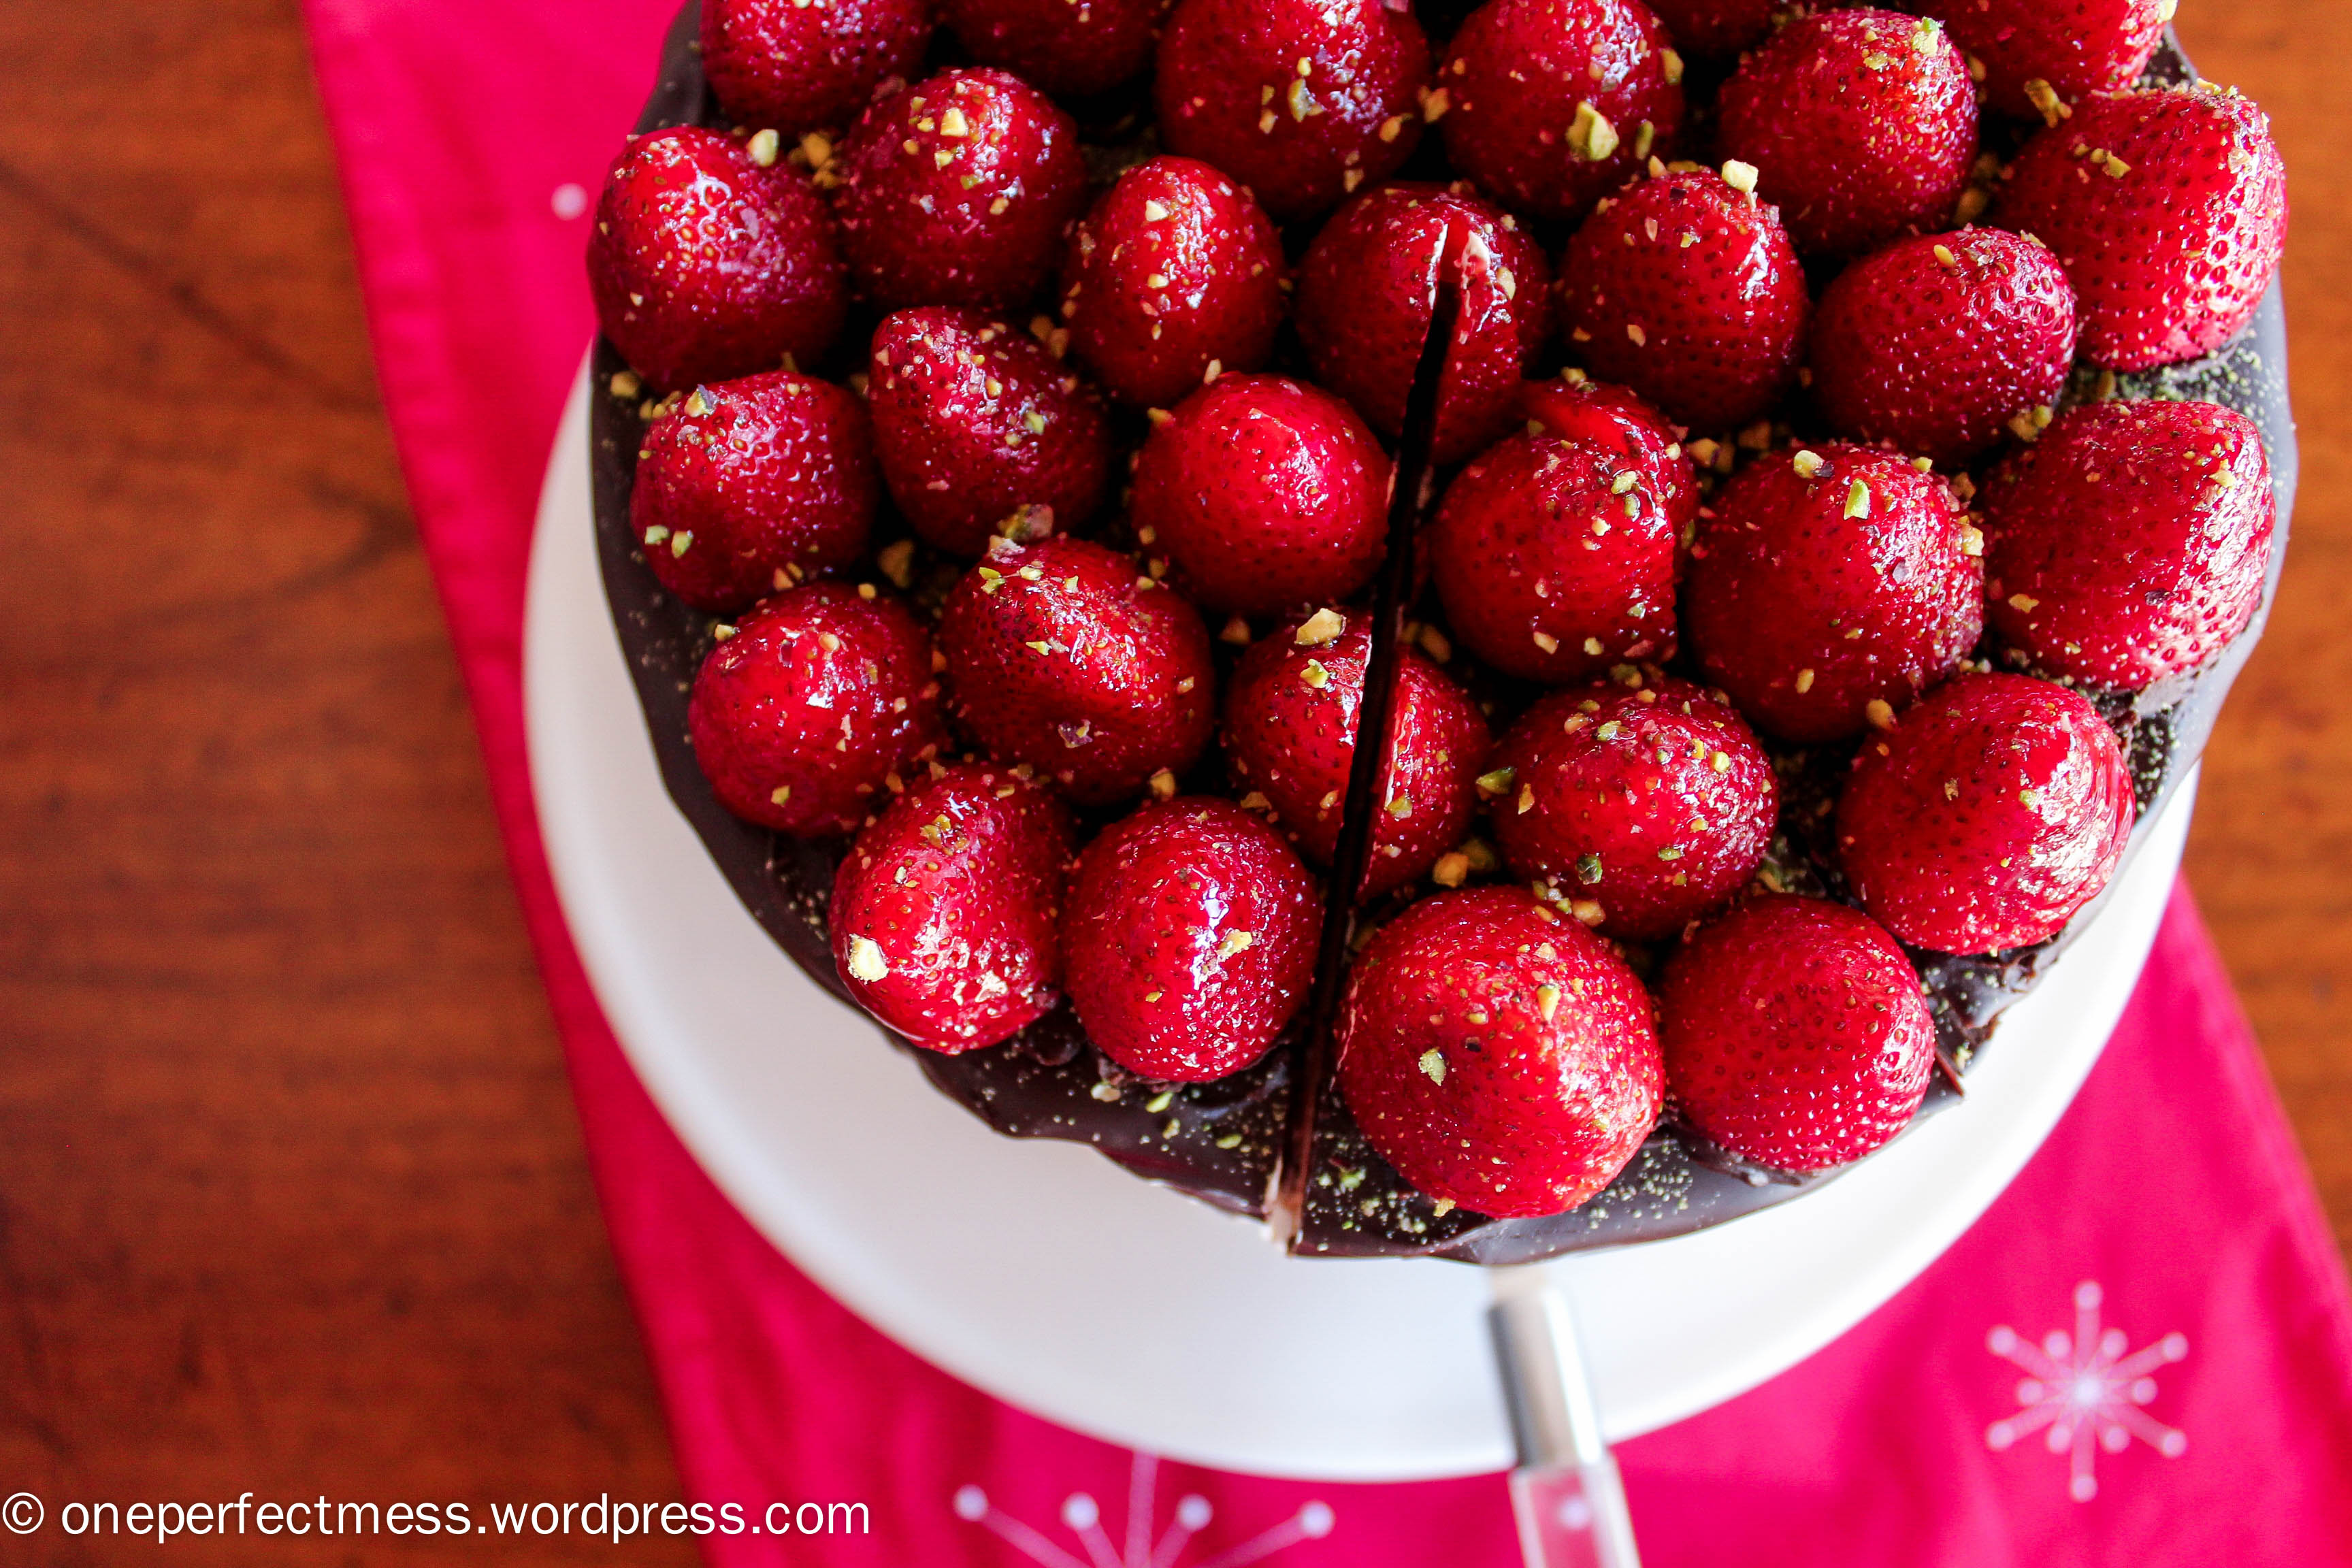
- Arrange the strawberries on the surface of the cake, pressing them gently into the ganache. If necessary, dip the base of each strawberry in remaining ganache to ensure the berries stick to the cake.
- In a small saucepan over low heat, prepare the glaze by combining the jam, lemon juice and water, and stir constantly for 5 minutes until thin. Strain glaze through a fine sieve, then use a silicone pastry brush to paint each strawberry until shiny. Sprinkle strawberries with pistachio dust.
- Chill cake for 30 minutes to set, then bring to room temperature for 1-2 hours before serving. Cut slices with a very sharp knife. Best of luck, have fun!!
Store the cake covered and refrigerated for up to 5 days, but best served within 1-2 days of baking. Bring to room temperature for at least 1 hour before serving.
Note: The cake can be made up to 2 days in advance, and stored in an airtight container. Swiss meringue buttercream can be refrigerated in an airtight container for up to one week, or frozen for up to 6-8 weeks. Before using it to frost your cake, allow it to cool to room temperature, then beat on medium speed using an electric mixture until it retains its silky, soft consistency. This can take up to 20 minutes, so be patient if the texture looks a little strange. For ease, if possible prepare the SMB immediately before you frost your cake.

Yummmmm
LikeLike
Thanks!!
LikeLike
Oh wow, it was definitely worth the time and effort! It’s gorgeous 🙂 Love the use of rosewater in the frosting.
LikeLike
Thank you! I couldnt resist the rosewater as a final touch, it was perfectly delicious without being too overpowering 🙂
LikeLike